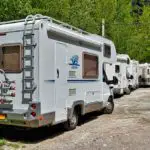
Whether you’re a new RVer or a seasoned pro, having and using an RV maintenance checklist. Routine maintenance helps keep your RV working and lasting longer. Not to mention, it keeps you and your family safe while on the road. If you’ve ever watched any RV movies about camping, you know what kind of disaster can strike on a long road trip. I’m guessing we would all love to avoid that fate.
If you’re overwhelmed with everything there is to manage and remember, using a maintenance log or app can help. The Maintain my RV app is included with this RV GPS. Together the two programs help you get where you’re going and maintain your rig along the way. Keep reading for a comprehensive regular RV maintenance checklist to stay on top of.
Clean and Wax as Part of Your RV Maintenence Checklist
Cleaning and waxing is not just about vanity. Sure your rig will look fantastic, but more importantly, the exterior will last longer. Regular washing and periodic waxing are something all RVers should get in the habit of doing. If you’re a weekend warrior, some people recommend you wash your RV after every trip. Don’t forget to clean the undercarriage.
Using an RV wash and wax is another option. It gets the body of your RV cleaned and waxed all at once. Still, don’t forget to get underneath if you go this route. Make sure wash your RV the right way so you don’t cause damage.
No matter what you choose to clean with, having a clean rig should be on everyone’s RV maintenance checklist.
Clear Out the RV Weep Holes
The bottom of most framed RV windows will have small vents or openings called weep holes. These holes allow water to flow out of your window well. Over time gunk, dirt, leaves, and so on can block the weep holes. When this happens, water sits in your window wells and can eventually cause a leaky window.
Luckily this is one of the easier RV maintenance checklist tasks. All you need to do is clean out the weep holes as needed. You can clean them by using a bottle brush or compressed air (like you use to clean your electronics).
RV Maintenence Checklist Items For Your Awning
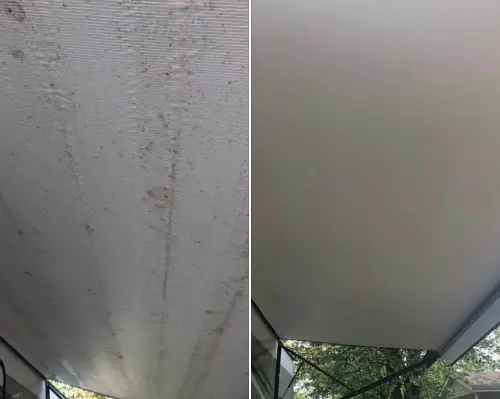
Cleaning your RV awning is something you should do as needed or at least once a season. Over time bugs, dirt, leaves, and sap can build up on your awning. It doesn’t look pretty, but even more importantly cleaning your awning helps it last longer. Be sure to complete the process gently so you don’t tear your awning fabric.
Some RVers swear by dawn dish soap. Spray the awning, add the soapy water mix, roll it up for 5 minutes, unroll, rinse and you’re done. If this doesn’t get off the tough stains, other RVers say they can’t live without the magic eraser mop for their awning cleaning.
Whatever you choose, after you clean your awning as part of your RV maintenance checklist , make sure you allow time for it to fully dry out before rolling it up. This will prevent mold or mildew build-up.
Lubricating Jacks
When we break down camp about once a month, we lube the jacks. If you travel less often, you should still complete this RV maintenance step at least a few times a season. You will want to use a silicon-based spray-on lubricant. Spray it on and wipe it with a paper towel to coat the entire jack stand (you won’t need much). WD40 is not recommended because it will attract dirt.
RV Maintainance Checklist for Your Roof
The next RV maintenance checklist item involves monitoring, inspecting, and keeping your roof in tip-top shape. Replacing your roof costs a lot more (in time, energy, and money) than maintaining it. Sweeping the roof periodically or after a big storm is wise.
While you’re up there, check all your seals to make sure none of them need to be re-sealed. You can reseal any problem spots using a self-leveling lap sealant like Dicor.
Lube Your Chassis/Grease Your Zerk Fittings or Bearings
Use a grease gun to lube all zerk fittings on the chassis if you have a motorhome. Poke your head around all your steering and suspension components and on the drive shaft of some vehicles to find them all. Some vehicles also have them on their U-joints. On a travel trailer or fifth wheel, make sure you keep your bearings greased.
Lubricating Slides: An RV Maintenence Checklist Must-Do
RV slideouts can be a problem area if not properly maintained which is why this should be on everyone’s RV maintenence checklist. Being ready to leave only to have your slides stuck out is not something you want to deal with. One way to keep your slides working well is proper RV maintenance.
Joel and I stay most places monthly and each time we pack up at the end of a stay he lubricates the slide mechanism. The consensus is lubricating your slides least monthly is the way to go. Not everyone does it this often, but it definitely doesn’t hurt.
Lubricating your slides seals with rubber conditioner is something that can be done as needed. We got brand new seals on our RV when we got it almost 3 years ago and haven’t needed to do this yet. However, it is important to continue to inspect the seals. If there is a problem, you can catch it early and hopefully fix things before you get a huge water leak.
Monitor for Leaks/Water Damage to Prevent More Costly RV Maintenance or Repairs
You should regularly check your cupboards, slides, walls, window seals, bathroom, and other plumbing for water leaks. Slow water leaks can be easily missed if you aren’t looking for them which is why it should definitely be on your RV maintenence checklist. When this happens, you can end up with massive water damage that is expensive to repair. Don’t forget to check in on your RV when it is in storage to monitor for water leaks as well.
Sanitize Your RV Tanks for RV Maintence Checklist
You should sanitize your fresh water tank every 3-6 months depending on how often you use it. If you are constantly on the road, some RVers will even recommend sanitizing your freshwater tank once a month. Mold and algae can grow inside your freshwater tank and who wants to drink that! Add this to your RV maintenence checklist for a happier time.
For your black and grey tanks sanitizing can keep them working better and mitigate any nasty smells. One of the simplest ways to stay on top of this job is to use a holding tank treatment. Many RVers like Happy Camper and you can use it in both the black and grey tank to keep things clean. There are other products out there that also work well. In addition to controlling odor, these tank cleaners help break down waste and toilet paper so you’re less likely to get a clog (ew!)
Another important thing to do is deep clean your tanks periodically. At the very least, you should deep clean them before putting your RV into storage for the winter. Ideally, you would do it more frequently, such as after every trip, if you camp only occasionally.
Regular black tank RV cleaning can also help your tank sensors provide more accurate readings. One way to clean your RV black tank is to get down and dirty with a swivel stik. If you prefer a less up close and personal approach, you can also use a reverse flush valve. Some people don’t feel a reverse flush valve cleans as thoroughly, but it is a great option for many people.
You can also complete a deep clean as part of your RV maintenance checklist by using a simple soapy water mixture. There are also various other sanitizing products on the market for this process. Most RVers don’t recommend bleach as it can dry out the seals especially if used regularly.
Sanitize Your Fresh Water Hose
Although you should take good care of your freshwater hose to avoid contamination, regular sanitizing is still a good idea. The simplest way to do this is to place your entire hose in a large bin or tub of water with a small amount of bleach (about 1 cup of bleach per five gallons of water).
Let the hose soak for around ten minutes and rinse it immediately afterward. Let your hose dry as much as possible and then store it as usual. Sanitizing your freshwater hose is something you should do about twice a year. If you’re in need of a better freshwater hose, I recommend the Zero- G hoses.
Seal Any Holes to Prevent Mice
Getting mice is an RVers worst nightmare. Not only are mice gross, but they can cause plenty of damage to your RV. Whether your RV is in storage or you’re using it, you should regularly inspect your RV and seal any potential entrance points.
Sealing interior and exterior entry points is the single most effective way to keep mice out of RVs. Mice can fit through holes as small as a pen or a dime depending on their maturity. Another good way to prevent mice is to deep clean your interior before storing your RV for any length of time. That way there are no tasty crumbs left behind for a hungry mouse. Don’t leave this one of your RV maintenence checklist or you’ll be sad.
Maintain Your RV Safety Equipment
One of the most critical but easily overlooked things that should be on your RV maintenence checklist is safety equipment. You should regularly test your smoke detector, carbon monoxide detector, and LP gas/propane detector. Repair or replace them as needed. Also, don’t forget to check your fire extinguisher. Even if not used, these can become obsolete if they are too old which won’t do you any good in preventing RV fires. If the tank reads empty, you need to replace or recharge it.
Inspect Electrical Connections/Fuses Must Be on Your RV Maintenence Checklist
As you drive down the road, things bump and bounce like crazy. This can easily loosen your electrical connections. If this happens, they can short out and potentially cause an electrical fire. You should check your connections at a minimum at the start of every camping season.
If you travel down especially rough roads, you might as well take a few minutes to check them as part of your setup process. If they came loose during travel, you can easily fix the situation before it becomes a disaster. Better safe than sorry! (I say from experience on this one. We had loose electrical connections once and were lucky we didn’t have a fire).
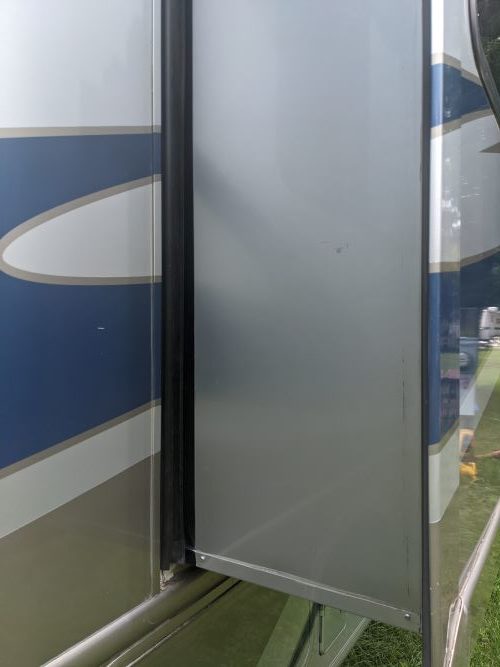
Replace Weather Stripping
Your outdoor storage compartments most likely have weather stripping. This helps keep out dirt, dust, and most importantly water. Over time, the weather stripping breaks down and needs to be replaced. If it looks like it is worn out or compressed, you should change it out to prevent bigger problems.
RV Maintenence Checklist for Regular Vehicle Maintenance
Don’t forget to add the regular vehicle maintenance needs of a motorhome to your RV maintenence checklist. Just like your car, your RV needs oil changes, air filter changes, and so on. Follow the scheduled maintenance recommendations for your specific motorhome for the best results.
You should also check your brakes on the chassis and/or trailer and replace the brake pads as needed. The lifespan depends on various factors including driving conditions, terrain, and the specific brake pads you are using.
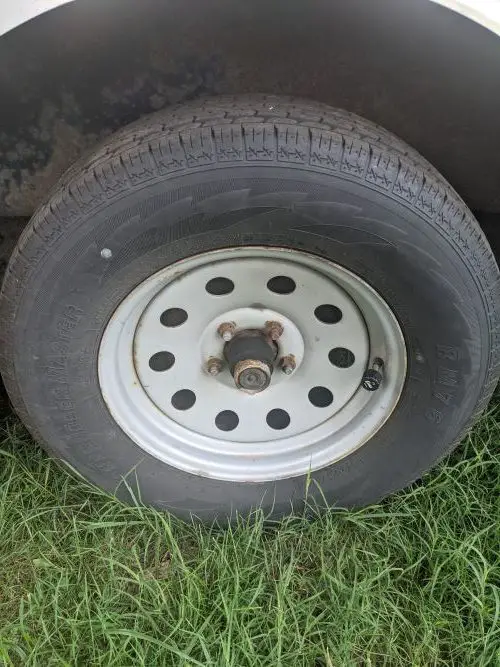
Inspect Your Tires as Part of Your Routine RV Maintence Checklist
Checking your tires is an absolute must have on your RV maintenance checklist. In fact, checking the tires is something you should basically do constantly. Every time we stop on a road trip, Joel does a walk around to check the tires for any abnormal wear, sidewall damage, excessive heat, or foreign object penetration. Before leaving on a trip, you should do all of these things. Additionally, check your tread depth and ensure you adjust your lug nuts to the correct torque.
The most important thing to know about RV tires is that age is more important than tread depth. Most RVers recommend changing out your tires every 3-5 years at most regardless of how much tread they have left. That is because you are more likely to experience a blowout before running out your tread. Remember, your tires could be older than the RV, so check the dates to determine when to replace them.
Driving too fast, towing more than your tires are rated for, and over or under inflation all increase your likelihood of a blowout. Using a tire pressure monitoring system (TPMS) is another simple way to have constant alerts regarding your tire health even while you drive. This simple RV gadget could save your RV or your life. I wrote a review of the Truck Systems Technologies TPMS, with even more details.
If you have a trailer, you may need to rotate your tires periodically. Typically, the back tires wear faster than the front due to drag when turning. Rotating your tires can help them last longer and be safer.
Grease Your Hitch Ball
If you have a travel trailer or tow something behind your motorhome, don’t forget to grease your hitch ball. You should inspect the hitch ball every time you hook up and make sure the ball is always greased before you tow. To help your grease last longer, you can put a cut in half tennis ball over the ball when you’re parked. Adding this to your RV maintenence checklist ensures you don’t forget this simple yet important item.
Hitch Maintenance
You should also inspect your hitch before every trip as part of your regular RV maintenance checklist. Check the bolts and welds to ensure a sturdy connection. Grease when and where necessary depending on your particular setup.
Check Exterior RV Lights
Before you take off for a fun RV road trip, don’t forget to check your lights. Make sure headlights, taillights, brake lights, and blinkers are working properly. This takes only a few minutes and makes for a much safer trip.
Generator RV Maintenance Checklist
If you have an onboard generator, it also needs a little love. You should check the oil and change it as needed. It is also a good idea to periodically run the generator to keep things running smoothly. If it sits too long, the carburetor could get gunked up and could have difficulty starting and running consistently. Refer to your generator’s maintenance schedule for more details on what your particular model needs on a regular basis.
Maintain Your RV Batteries
Did you know your lead-acid batteries have water in them? They sure do. And this is another piece of RV maintenance. Check the water levels on your batteries and add distilled water to top them off if needed. Remember to use only distilled water as regular tap water can damage your batteries and shorten their lifespan. While you’re inspecting the batteries, tighten your battery cables to ensure they are connected appropriately.
Clean and Change the Air Conditioner Filter
Many manufacturers recommend maintaining your RV air conditioner by cleaning your air filter every 2 weeks (when in use). Others advise cleaning it once a month. To do this, you can gently vacuum out any dust, then remove the filter and wash it in warm soapy water. Let it dry completely before putting it back in. If you can’t clean the filter or it looks weathered and worn, it is time for a replacement filter.
RV Furnace/Propane Maintenence
There is a lot that goes into RV furnace and propane maintenance. Unless you are skilled and confident in this area, it is best to enlist the help of a professional. That’s because furnace failure or propane problems could cause an RV fire or explosion. Most professionals recommend having your system inspected at least annually.
RV furnace maintenence checklist items can include cleaning out the ducts and ensuring there are no propane leaks.
Weigh Your RV
If it has been a while since you’ve weighed your RV, doing so is not a bad idea. As you add things to your rig, the weight inevitably increases. It is important not to exceed maximum weight ratings. You also need to ensure your tires are up to the task. Weighing your rig is the best way to know if you’re road-ready.
Water Heater Anode Rod Replacement
Some RV water heaters have an anode road that needs to be replaced periodically as part of your RV maintenance checklist. The anode rod is located inside water heaters with steel tanks to prevent corrosion.
Your anode rod will typically last much longer than a year, but most RVers recommend checking it annually. After the anode rod has lost about 75% of its initial mass, replace it. Slacking on this task could lead to corrosion of your water heater tank.
Lubricate Hinges/ Door Latch
To keep your doors and compartments working properly, your RV maintenance checklist should also include lubricating your hinges and door latch. This will also cut down on the need to crank on your door handle to open it. And everyone could do without squeaky hinges.
How to Stay on Top of Your RV Maintenance Checklist
As you can see, there is a ton that goes into RV maintenance. It is easy to forget things. I recommend getting into the routine of checking everything I’ve covered. Make yourself an RV maintenence checklist, print out or bookmark this page, or use Maintain my RV which is included with an RV Trip Wizard purchase.
If you’re not sure how to do something, enlist a professional or ask for help from other RVers. Just don’t ignore it because you aren’t sure what you do. If you go that route, you’ll have more problems than you care to imagine.