Just because the snow is flying in many parts of the country doesn’t mean you can’t still RV. In fact, many people RV all year long, even if they aren’t in Florida, Arizona, or other similarly warm climates. If you don’t winterize the RV, you still need to prepare. One must-have item for winter camping is a heated RV water hose or using heat tape for RV water hoses.
Winter RVing comes with its own set of challenges, one of which is using water in your RV in the winter. It can be done, but without the proper precautions, you’re in for a rough time. Luckily, there are some simple steps you can take to prevent freezing. But is a heated RV water hose really something you have to use? Keep reading to find out.
Do You Really Need a Heated Water Hose?
When you’re new to RVing, it seems like you just have to buy one thing after another to have all the supplies you need to use your RV. If you want to use your RV water in the winter, do you really need to spend money on yet another thing? Let’s dive in.
Heated RV water hoses such as the Camco Heated Water Hose are popular with RVers. They automatically turn on when the temperature drops below a certain point to help prevent your hose from freezing. Buying a ready-made heated RV water hose can certainly make life a bit easier. There is little set up involved and they can be a solid choice for people just out now and then.

Downsides of Heated RV Water Hoses
Like any seemingly perfect quick fix, there are some serious downsides to buying a heated RV water hose. First, they are expensive and many RVers complain about them breaking after only a short time. Additionally, it means you have to have and maintain two separate water hoses.
Another downside is that a heated water hose by itself isn’t enough to prevent water from freezing as it enters your RV. That’s because there are still several places where water can freeze. The spigot itself is one place.
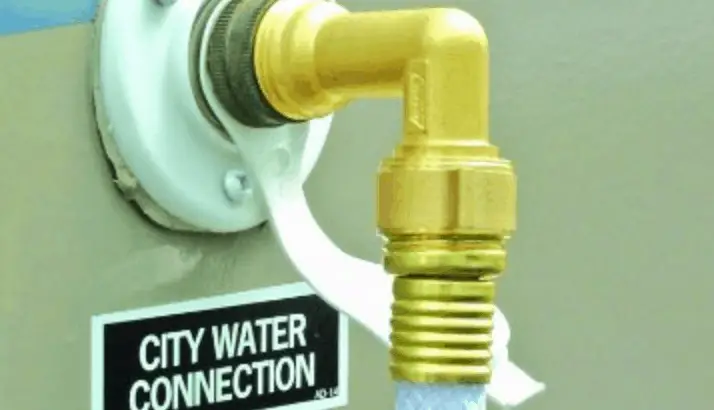
Another is any brass fittings like your elbow joint or water pressure regulator. Which if you don’t already have both of these items you definitely should get them to prevent damage to your rig’s water system all year round. They are a cheap way to prevent potentially costly and frustrating issues.
If you use a water filter, which I highly recommend, that is also subject to freezing.
You can add heat tape to only these areas (keep reading for instructions). Since you’re already going to be using heat tape, there is a better alternative to buying a heated RV water hose if you’re willing to do a little extra legwork. Use heat tape for RV water hoses for the perfect DIY heated RV water hose.
For people staying in place for a couple of weeks, or even an entire winter, there is a more cost-effective, and arguably better quality way to prevent your water hose from freezing. If you will only be out for a few days, the convenience of a heated RV water hose might be worth it. But don’t forget to heat tape problem spots. Even for our short stays we opt for heat tape for the RV water hose for all the reasons I already mentioned.
Heat Tape for RV Water Hoses for a DIY Heated RV Water Hose
One of the best ways to prevent freezing is using heat tape for RV water hoses so you can DIY a heated RV water hose and skip all the problems. First, there are a few supplies you’ll need. I’ve linked to some product examples for your convenience. You can also find most or all of these at your local home improvement store.
- Regular drinking water hose
- Aluminum Foil
- Heat tape/ Heating cable
- Foam Pipe Insulation
- Electrical tape
Once you have your supplies, follow these simple steps to use heat tape for your rv water hose. We are staying in warmer weather this winter so I don’t have photos of our setup but we used it last winter with success!
Step 1: Attach your hose to your RV and spigot as normal
This step is pretty straightforward. Since you will be using heat tape for your the RV water hose, you can use your water pressure regulator, elbow joint, and inline water filter as usual. If you want to prepare your hose before attaching it, make sure you leave several inches to a foot of heat tape at either end to attach to your water inlet and the spigot.
Step 2: Wrap the entire water hose in aluminum foil to make your heat tape RV water hose
Wrap your entire hose and your water filter in aluminum foil. This will help the heat tape for your RV water hose conduct heat more efficiently and evenly along the length. The foil should stay on pretty well by itself, but if you want to make sure it doesn’t slide off, you can also add some foil tape to attach the aluminum foil.

Step 3: Attach the Heat Tape to Your RV Water Hose
Now that you have a shiny, aluminum foil-covered hose, it’s time to put the heat tape on your RV water hose. Lay the heat tape in line with your hose and attach it using electrical tape. It is important to NOT coil the heat tape on your RV hose. If you do this, it can actually become too hot. The hose and the heat tape should both be in a straight line. The electrical tape will ensure it stays in place, so no coiling or wrapping is needed.
You also need to attach heat tape to any brass fittings like your elbow joint or water pressure regulator. You should also leave enough at the end to wrap the spigot so this doesn’t freeze either.
The heat tape will come with a sensor that turns it on only when needed. Make sure you leave the sensor exposed or in contact with your hose so that it turns on properly. The insturctions on your heat tape will provide specific details.


Step 4: Cover everything with the foam pipe insulation to finish your DIY heated RV water hose
After you have attached heat tape to make your own heated RV water hose, you need to put the foam pipe insulation along the entire length of the hose. You should also cover your fittings, water filter, and spigot with insulation.
Once you do this, you can use some of your spare electrical tape to tape the insulation in place. Tada! You have successfully used heat tape for your RV water hose so you have your very own DIY heated RV water hose for winter. Now you can continue to use your water as usual during the winter without the risk of freezing.
How to Prepare Your Grey and Black Water Tanks for Winter Use
If you’re using your water in the winter, there are a few other things you need to do as well. The DIY heated RV water hose is just the start. You also want to prevent your valves and tanks from freezing.
One important way to prevent freezing is to use DIY RV skirting for winter. In addition to using a proper skirt, I recommend adding a heat lamp or high wattage light bulb under the RV to keep it warm. Depending on the size of your rig, the outside temperatures, and the quality of your skirting, you may need more than one lamp. An added benefit of skirting is that it makes it easier to heat your RV and keep warm without using so much propane or electricity. Good for your wallet and the planet.
You should also consider adding tank heaters to your black and grey tanks (and your freshwater tank if you are using it).
To prevent your valves from freezing, add heat tape to your black and grey water valves. Also, keep them closed except when dumping your tanks. And make sure you have a downward slope from your rig to the sewer connection or you’ll have a nasty frozen mess in your sewer hose when you are ready to leave. One easy way to get this downhill slope is to use a sewer hose support. Some people even unhook their hose except for when dumping.
You are Now Prepared for Winter Camping Fun with Your Heat Tape for RV Water Hoses
Don’t let cold weather stop you from doing what you love. In fact, camping in colder weather can help you beat the crowds and get the best site. You’ll still be able to get out and enjoy the local area. While you do, you’ll have peace of mind knowing your heat tape for the RV water hose is preventing freezing. Having your own DIY heated RV water hose gives you the peace of mind you need to enjoy camping all year round.