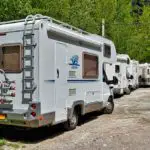
Winterizing your RV is one of the most important parts of being an RV owner. Skipping this task or missing a step is a recipe for disaster. If you want to do it right, winterize your RV using this guide. I’ll go over how to winterize your RV with an air compressor.
Winterizing Your RV with an Air Compressor
Winterizing your RV with an air compressor may seem more intimidating than winterizing your RV using anti-freeze. However, there are several reasons to choose this option. One of the major benefits of using an air compressor is to simplify things come spring.
If you use anti-freeze to winterize your RV, you’ll have to flush and sanitize your lines come spring. This process can take quite a while. And if you don’t get all the antifreeze out, your water will have an antifreeze after taste. Gross!
You also don’t have to mess with running to the store to purchase antifreeze. Which was in short supply in some places this year.
If you live somewhere with deep freezes for a long time, you also might want to double-down on your winterizing. When we stored our RV one winter in Michigan, we blew out the lines with an air compressor and used antifreeze.
When you use both methods of winterizing, you have peace of mind knowing your RV is protected. Plus, when you go this route, you don’t have to use as much antifreeze.
For now, let’s jump into the steps to winterize your RV with an air compressor.
Step One: Prep the RV for Winterization
Before you winterize your RV, you need to do a few things to prep. Also, don’t forget to check out everything you need to do to prepare the exterior and the interior for winter storage.
- Disconnect for your water supply. If you are already disconnected, make sure you turn off your water pump.
- Turn off power to your rig. It is also a good idea to turn your water heater off the day before so you don’t have to worry about burns.
- Turn off the propane for good measure. This is a little extra safety step that takes all of 5 seconds and ensures you don’t have any propane issues. You’ll want to turn your propane off during the winter, anyway. Many RVers also recommend having a full tank or removing the tanks if they are removable.
- Consult your owner’s manual for appliances like a dishwasher, fridge, or washer. These appliances each have specific instructions you’ll need to follow for proper winterization and they vary between models.
- Drain the fresh water tank by opening your low point valve on the RV exterior.
- Drain your water heater and flip the bypass valve. This will allow the air to flow directly through the lines and not into the tank.
- Make sure all other holding tanks, including your grey and black water tanks, are properly drained using an appropriate dump station.
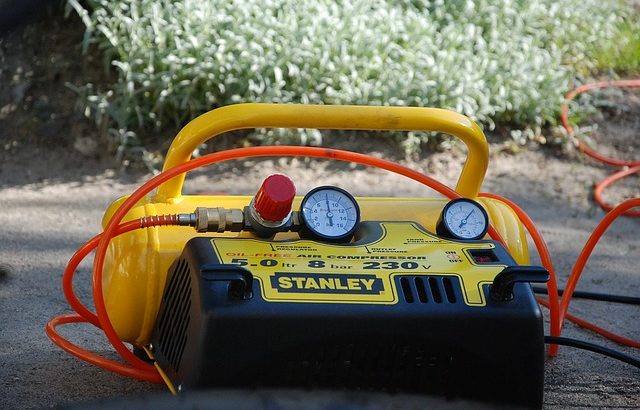
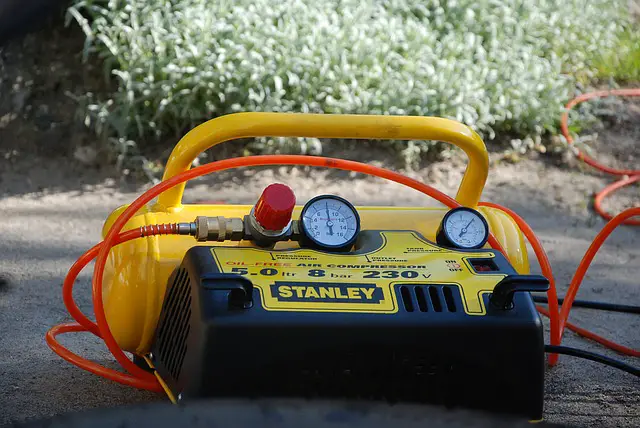
Step Two: Picking the Right Air Compressor
Once you have prepared your RV to winterize, you’re ready for the next step. Time to bust out the air compressor. If you don’t have an air compressor yet, here’s what to look for.
First, it is best to have an air compressor that can serve two jobs, blowing out your lines and inflating your tires. Make sure to get an air compressor with a PSI rating at least equal to your RV tire pressure but preferably higher so you don’t max out your air compressor.
Another important consideration for blowing out lines is the airflow rate. This is actually more important than the PSI for this task. When in doubt, opt for a higher flow rate if possible. You should also choose an oil-free air compressor to ensure you don’t get any oil in your lines during the blow out process.
Here are a few good options for air compressors that will do everything you need in your RV.
Viair 400P Portable Compressor: This compressor is small, tankless, and powerful. It gets the job done but takes up much less space than other air compressors.
Another good choice is the Viair 450P Portable Air Compressor. It delivers higher pressure so if you have a large motorhome, it will likely serve you better for airing up the tires than the 400P model. However, the 400P model has a higher flow rate which as I mentioned earlier is more important for winterizing your lines. If you don’t need the added pressure of the 450P, you can maximize your winterization (and cost savings) by opting for the 400P.
Both of these models are compatible with the Viar Winterization kit which contains everything you need for winterizing your lines.

Step Three: Winterize Your RV with an Air Compressor
Once you have all your supplies, you are ready to start winterizing. Here’s what you need to do to winterize your RV with an air compressor.
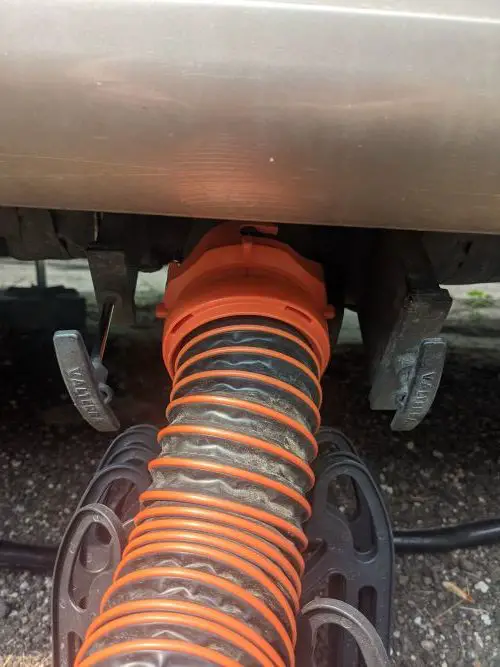
- Connect the blowout plug to the city water inlet. This is where you usually attach your hose when hooking up at a full hookup site.
- Connect the blowout plug to the air compressor hose.
- Set the pressure on your air compressor to no more than 30 PSI (remember, the flow rate is more important than pressure). If the pressure is too high, you can actually damage your water lines. Pro tip: If your air compressor doesn’t have a built-in pressure regulator, you can attach your water pressure regulator directly to the city water inlet. Then, attach the blowout plug to the water pressure regulator.
- Run your air compressor.
- While the air compressor is turned on, go through each of your faucets one at a time. Open each faucet and let the water run until only air comes out. Then move on to the next faucet. You must open each faucet including hot and cold faucets, shower, toilet, outdoor shower, and the outdoor kitchen sink if you have those.
- Even though the lines are blown out, you should still add a small amount of anti-freeze to each of the p-traps. Don’t forget about the shower.
- Add a few inches of anti-freeze to the toilet bowl to keep your seal wet so it lasts longer and doesn’t dry out.

Step Four: Rest Easy Knowing Your RV is Ready for Freezing Temperatures
If you live somewhere where the freezes aren’t as cold or as long, congratulations, you’re done! If you want extra peace of mind in an especially cold area (I’m looking at you Midwesterners), you may want to use anti-freeze to winterize your RV as well.
Otherwise, you can have confidence knowing you successfully winterized your RV with an air compressor. Now you won’t have any busted lines (or nasty antifreeze aftertastes) to contend with come spring.