When you buy a new RV, the dealer might throw in a few things you need for hooking up. After that,it’s its often “bon voyage” as the reality of your purchase slowly sinks in. You might even ask yourself, “How does this thing work anyway?!”
Well, you’re in luck, because the steps to hook up RV water at your site isn’t too tricky. Here’s everything you need to do to get water to your RV at a campground with water hookups.
Step 1: Make Sure You Have All Your Supplies to Hook Up RV Water
Before you can hook up your water in an RV, you need to have some supplies. The first thing you need is a drinking water hose. You can get a drinking water hose for cheap, but if you want an upgraded water hose, the Zero-G hoses are some of the best on the market.
To keep your family safe, make sure the makers specifically rated the hose you get for drinking water. This will help ensure so no chemicals leech into your water.
You will also want to have a 90-degree elbow connector. This will make your life much easier as you try to attach your hose to the city-water inlet. (More on that later if you don’t know what I’m talking about).
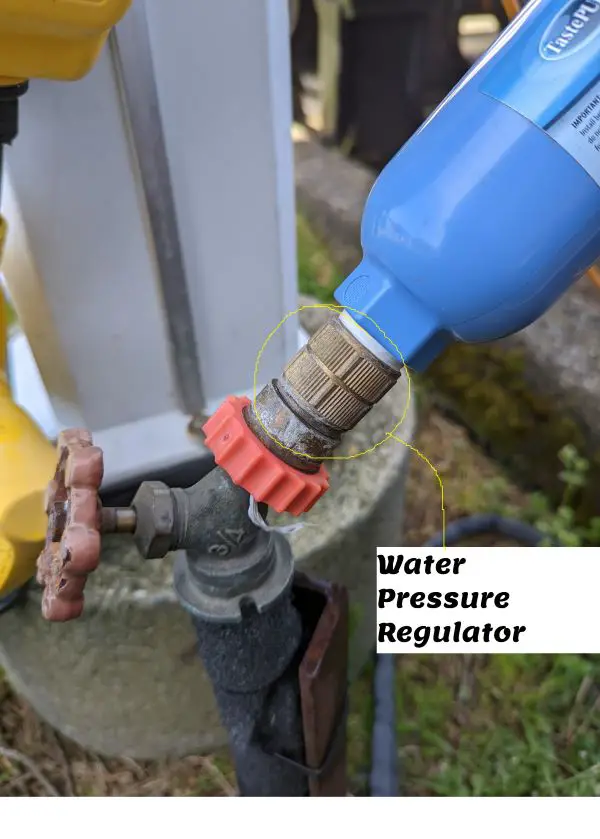
Every RVer should also use a water pressure regulator. They help protect their lines from damage resulting from high pressure park water. There are some fancy water pressure regulators out there, but the simple ones cost around $10-15 and do a pretty darn good job. We have been full timing for several years with a very basic water pressure regulator.
I also recommend having a can of Lysol spray to sanitize the spigot before hooking up. Adding teflon tape to all your connection points can help prevent leaks.
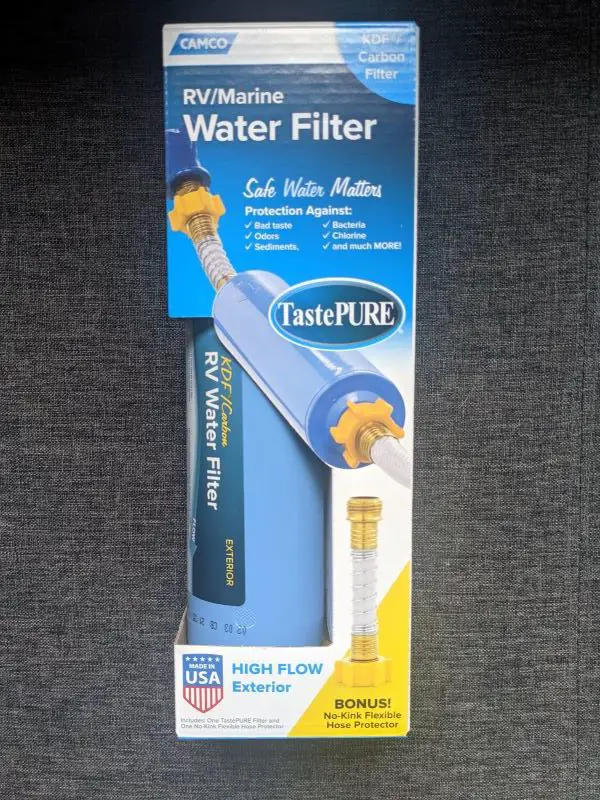
We also use a water filter everywhere we go, because you never know what is in your water. There are many RV water filter options on the market. The Camco Tastepure inline water filter is the one you will probably see most often. However, there are many types of RV water filters that all work a bit differently. Be sure to follow the manufacturer’s recommendations for how often you need to replace your water filter.
Step 2: Hook Up RV to Water
Now that you’ve wrangled your hose, it’s time to get setup.
The first thing you should do is use your Lysol spray on the spigot and allow it to dry naturally. You never know if the person before you use the spigot to rinse out their sewer hose before packing up. (By the way, ew, please don’t do this).
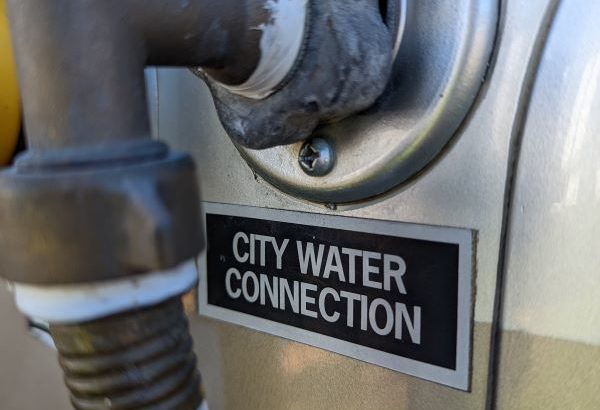
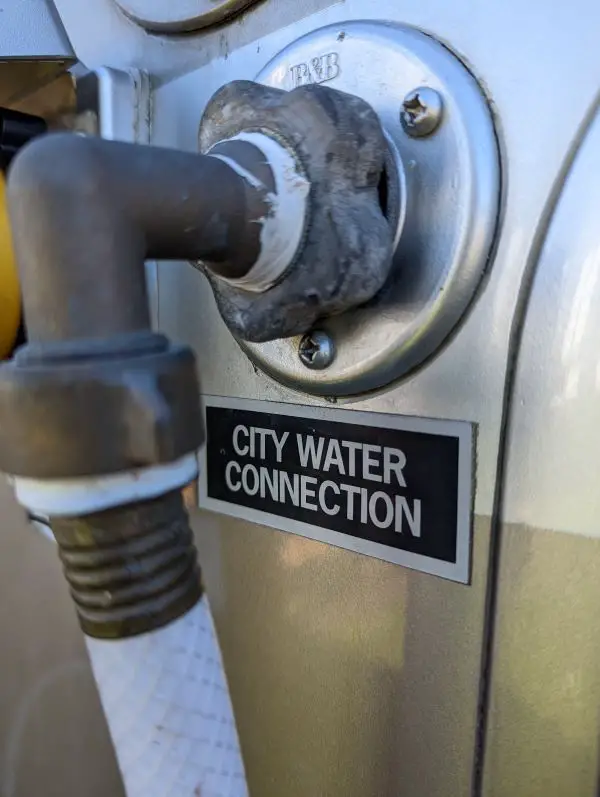
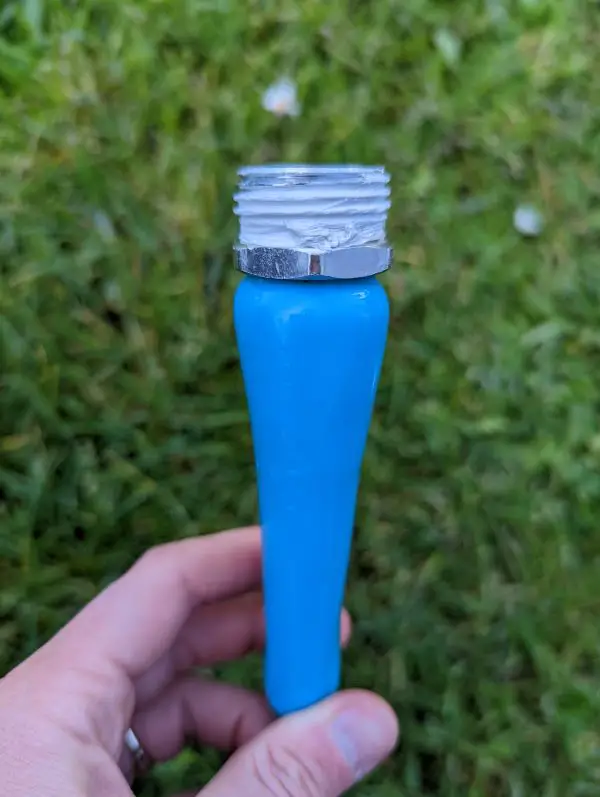
Next, find the city water inlet on your RV. It will typically be clearly labeled. Some inlets have caps, so if yours does, you can unscrew the cap. After that, wrap some teflon tape around the threaded end of your 90-degree elbow joint. Then, connect it to the city water inlet. Using a 90-degree elbow takes the pressure off the RV inlet.
Then, attach your water pressure regulator directly to the spigot. The jury is out on where you should attach your water filter. Some people say it should be closest to the spigot to keep bacteria from building up in your hose. Others say to put it at the city water inlet. The idea is if your hose has bacteria in it already, the water gets filtered right before entering your rig.
In our case, the decision was made for us. If we attach the filter to the city water inlet, our hose leaks from the weight of the filter.
Either way you choose is going to be better than doing nothing. To keep bacteria out of your hose, try to prevent the ends from touching the ground. When you store your hose, connect the two ends together to prevent anything unwanted from getting in.
Once you have the spigot set up with your water pressure regulator and your water filter is in place, it’s time to attach your hose. Wrap the threaded end of your hose and the spigot in teflon tape to cut down on leaks, then simply connect the hose to the elbow joint and the spigot.
After everything is all hooked up, you can turn on the spigot and wallah— water to your RV.
Step 3: Set Up Your Hot Water Heater
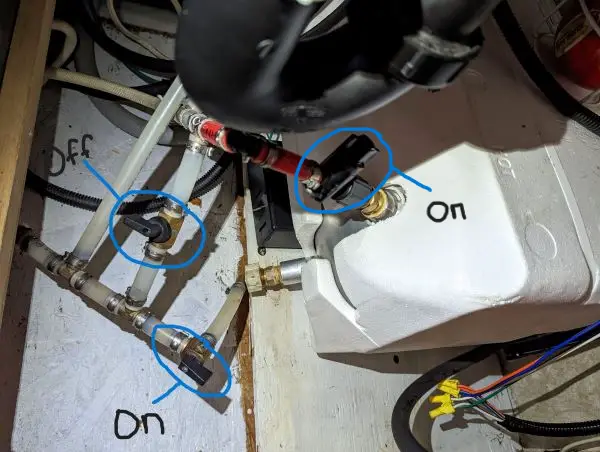
When you just buy and RV it may have the hot water bypass flipped for winterizing purposes. The hot water bypass prevents antifreeze from getting into the water heater. Before you can use your water heater, you need to make sure it is filled with water. For this to happen, the bypass valve must be off and the inlet and outlet open.
There are 3 valves on your water heater. When the water heater is being bypassed or skipped, there is one valve going into it that is closed and one going out that is closed. There is also a piece of tubing between them that bypasses the water heater. That valve to the tubing between is likely in the open position after winterizing or when you first purchase your rig.
To use the water heater, you need to flip all 3 valves so that the bypass valve is closed and the inlet and outlet are open. For those of us who may be more challenged in this area, the valve is open when the switch it is in line with tubing, as pictured below. It is off when the switch and the tubing are at a 90-degree angle to each other.
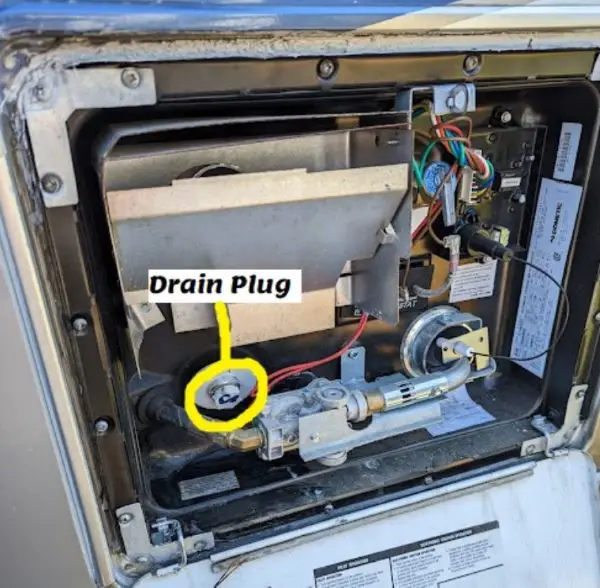
If you notice water pouring out of your water heater from the outside of your RV, don’t panic. You may just need to put the drain plug back in place.
Step 4: Dump Tanks as Needed
Once you’ve done everything above, you will have water to your RV. Now all you need to do is hook up your sewer connection. Then monitor your tank levels and dump the tanks as needed.